The lighting for food is important? Let Tastemade tell you!
“After acquiring the basic skills of food photography, if you want to take your photography game a step further, achieving tasteful results like seen on the famous food website TasteMade, you simply cannot go without the aid of proper lighting. This article is written to instruct people on how to properly light their food, and up their game in food photography.”
What is the most popular food website on the internet right now?
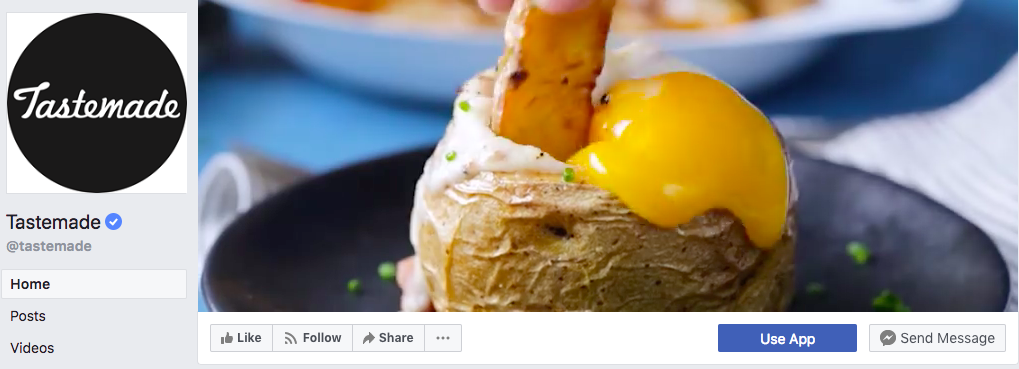
I guess considering user flow and exposure, the most commonly seen and famous brand TasteMade with now 17 million followers and counting must be the top choice in everyone’s mind. TasteMade produces concise and simple tutorial videos that can teach you how to make a delicious looking dish in less than two or three minutes. A lot of other food sites have started making videos similar to those of TasteMade’s, but little have been able to achieve the same allure and texture TasteMade presents in its images.
Why is that? The answer is really simple: improper lighting.
 The videos and photos of TasteMade contain two main characteristics, one is that they are mostly side-lighted, and secondly they are all shot directly from above, perpendicularly. Side-lighting can allow the surface texture of the food and its ebb and flows to appear more pronounced, and at the same time allow the image to transcend reality, making it look different than what we usually see on the dining table.
Furthermore, shooting the image from above also corresponds to how we usually look at our food from top to down, and at the same time, resolving issues such as the plates or background looking undesirable.
Presenting the food in a beautiful and appetizing manner is definitely a large part of TasteMade’s multiple reasons for success.
The videos and photos of TasteMade contain two main characteristics, one is that they are mostly side-lighted, and secondly they are all shot directly from above, perpendicularly. Side-lighting can allow the surface texture of the food and its ebb and flows to appear more pronounced, and at the same time allow the image to transcend reality, making it look different than what we usually see on the dining table.
Furthermore, shooting the image from above also corresponds to how we usually look at our food from top to down, and at the same time, resolving issues such as the plates or background looking undesirable.
Presenting the food in a beautiful and appetizing manner is definitely a large part of TasteMade’s multiple reasons for success.
 What we’re going to use today is a studio light, but please do not think this is overkill. Next time when you browse TasteMade, pay attention to the reflection on the fruits and dishes, you will find that on much of their food, there will be rectangular and strip-like white reflections caused by a studio or diffused lighting. These ordinary(yet dazzling) shots are all obtained through complicated and professional lighting.
Of course, if you’re just shooting with your mobile phone today, then I’ll explain how to use simpler equipment to get your shots. But if you’re going to be using a proper camera today, then you must choose between equipment as cameras can easily capture the flaws in your dish(as it can capture more details).
What we’re going to use today is a studio light, but please do not think this is overkill. Next time when you browse TasteMade, pay attention to the reflection on the fruits and dishes, you will find that on much of their food, there will be rectangular and strip-like white reflections caused by a studio or diffused lighting. These ordinary(yet dazzling) shots are all obtained through complicated and professional lighting.
Of course, if you’re just shooting with your mobile phone today, then I’ll explain how to use simpler equipment to get your shots. But if you’re going to be using a proper camera today, then you must choose between equipment as cameras can easily capture the flaws in your dish(as it can capture more details).
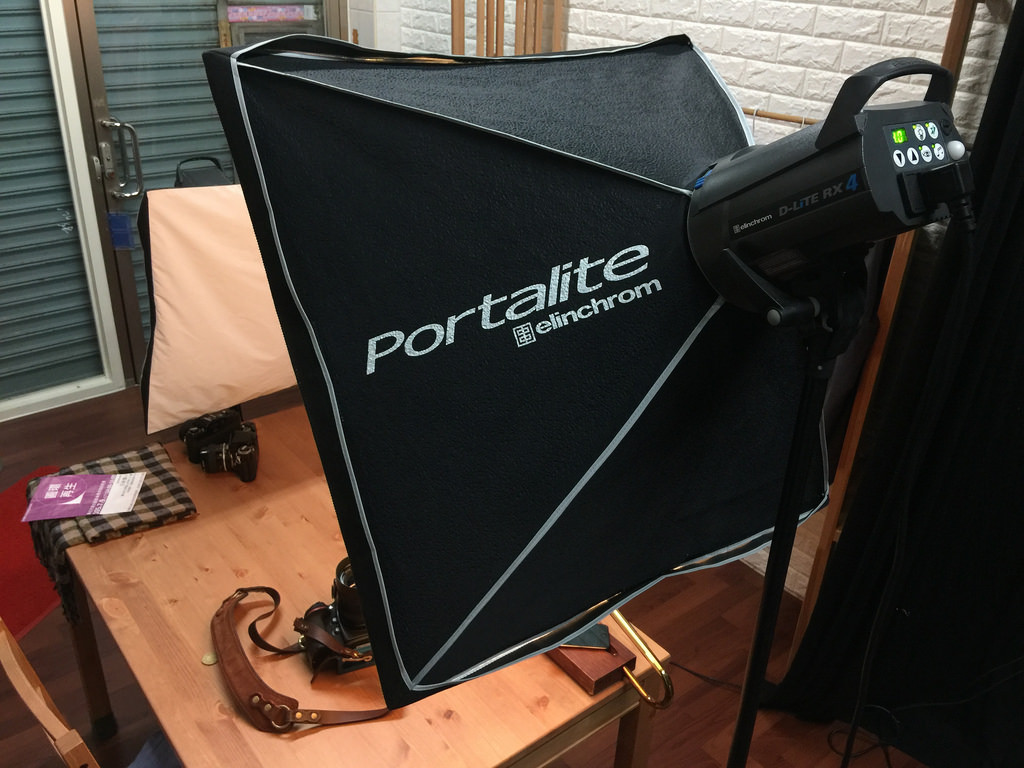 The method employed today is simple and can be achieved by using two lights plus the softbox kit. Additionally, this kind of setting can be used to take still images with the use of speedlights, and film videos with the use of modeling lights. If you want to make a video in the style of TasteMade, you must master the methods of lighting taught in this lesson today.
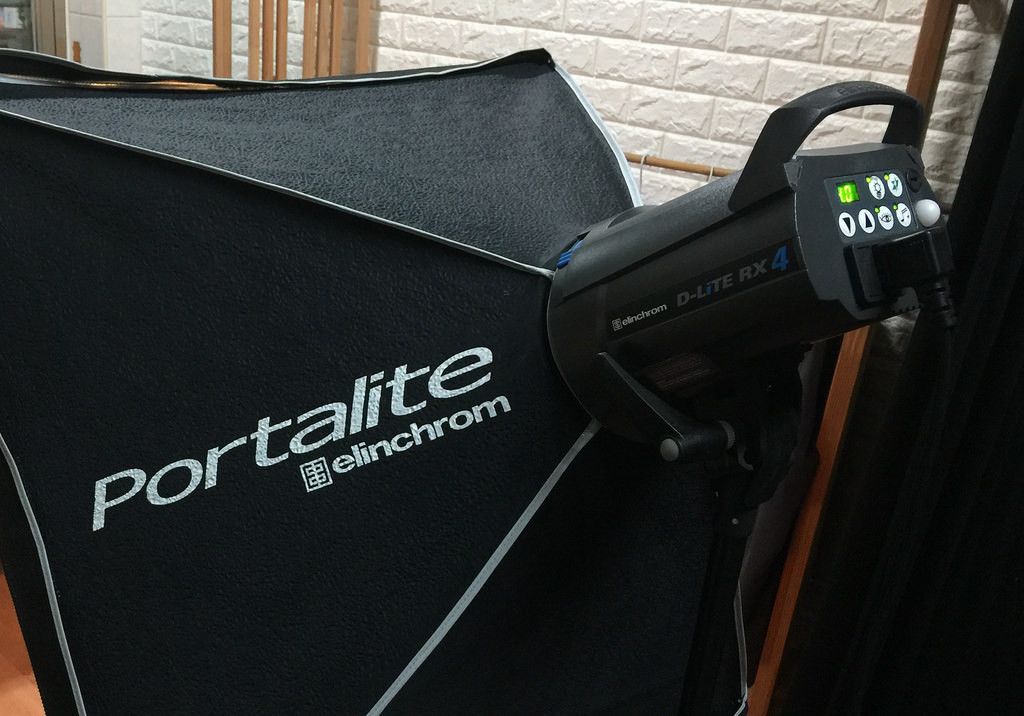
In the above image, you can see two lights being used. The one on the right is positioned higher, with the light hitting from the top right(facing the table directly downwards, emulating the visual angle of TasteMade) and all the way down, while the other light is parallel to the table, shining from the left to the right. The lighting setup is very simple, if you have trouble understanding the descriptions, turn on the modeling light and see the effects for yourself.
Proceeding, please take reference from the image below:
The method employed today is simple and can be achieved by using two lights plus the softbox kit. Additionally, this kind of setting can be used to take still images with the use of speedlights, and film videos with the use of modeling lights. If you want to make a video in the style of TasteMade, you must master the methods of lighting taught in this lesson today.
In the above image, you can see two lights being used. The one on the right is positioned higher, with the light hitting from the top right(facing the table directly downwards, emulating the visual angle of TasteMade) and all the way down, while the other light is parallel to the table, shining from the left to the right. The lighting setup is very simple, if you have trouble understanding the descriptions, turn on the modeling light and see the effects for yourself.
Proceeding, please take reference from the image below:
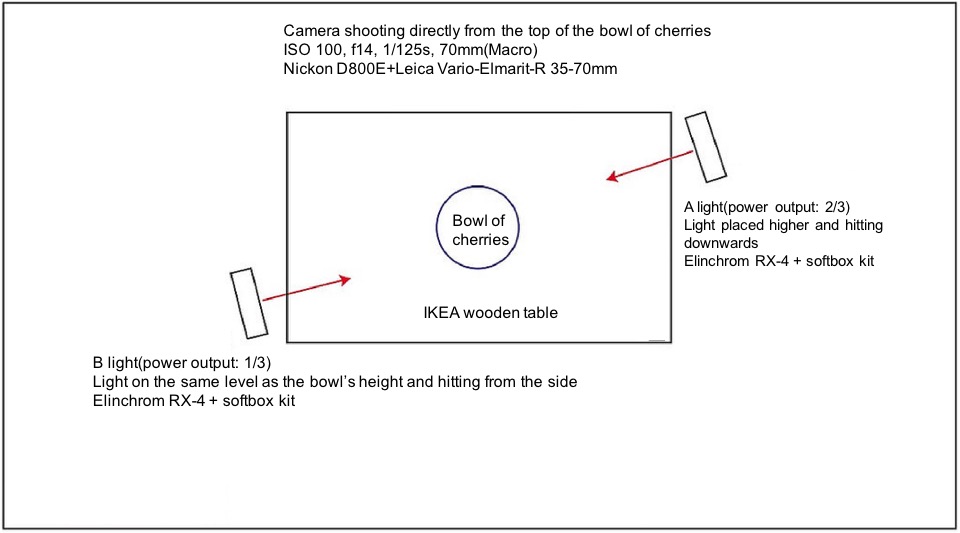 Setting up the lights is easy, but the power output setting of the lights do require special attention!
As noted in the image above, the higher light on the right is set at a power output of ⅔ (Elinchrom RX4’s display would be 4), and the light on the left is set at ⅓ (Elinchrom RX4’s display would be 2). The reason for this setting is to prevent the light sources from being too balanced, so the picture wouldn’t appear too “touristy”. Therefore by having some difference between the two light source, the resulting shadows on the left will allow the whole image to look more transcendent, refined and appealing.
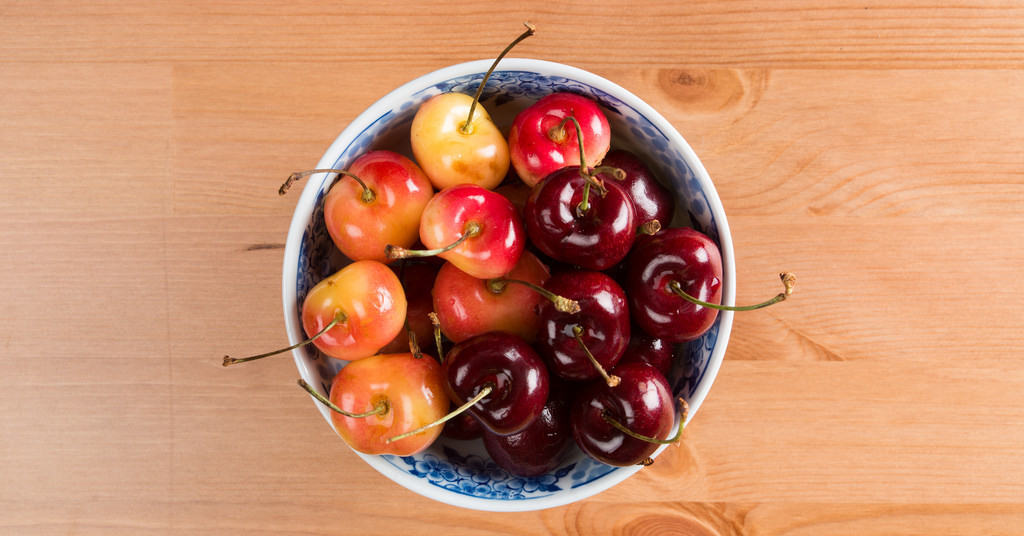
However do take note, please don’t forget about the fill-in light on the left in order to obtain the shadows. Having light coming in from the left size can enhance the shape of the cherries and prevent the image from looking overly “dramatic” by having too much contrast. If you only have one light at your disposal, you could also consider placing a reflector on the left, there is a link to an article in the end of this one that teaches you how to use reflectors to fill in light, so do take it as a reference. Furthermore, if you find it annoying to have to press the shutter everytime to check the lighting results, you could turn on the modeling light to preview the effect, which can save a lot of time.
What if the two light sources are balanced, how will the shot look then?
It actually wouldn’t look half bad, just a bit “ordinary”. Above is an example where the lighting on both sides are balanced, compare it to the photo in the beginning of this article, I guess you can come to your own conclusions.
If you are interested in our articles, you can also LIKE our page:)
Setting up the lights is easy, but the power output setting of the lights do require special attention!
As noted in the image above, the higher light on the right is set at a power output of ⅔ (Elinchrom RX4’s display would be 4), and the light on the left is set at ⅓ (Elinchrom RX4’s display would be 2). The reason for this setting is to prevent the light sources from being too balanced, so the picture wouldn’t appear too “touristy”. Therefore by having some difference between the two light source, the resulting shadows on the left will allow the whole image to look more transcendent, refined and appealing.
However do take note, please don’t forget about the fill-in light on the left in order to obtain the shadows. Having light coming in from the left size can enhance the shape of the cherries and prevent the image from looking overly “dramatic” by having too much contrast. If you only have one light at your disposal, you could also consider placing a reflector on the left, there is a link to an article in the end of this one that teaches you how to use reflectors to fill in light, so do take it as a reference. Furthermore, if you find it annoying to have to press the shutter everytime to check the lighting results, you could turn on the modeling light to preview the effect, which can save a lot of time.
What if the two light sources are balanced, how will the shot look then?
It actually wouldn’t look half bad, just a bit “ordinary”. Above is an example where the lighting on both sides are balanced, compare it to the photo in the beginning of this article, I guess you can come to your own conclusions.
If you are interested in our articles, you can also LIKE our page:)
相關文章
-
Dedicated to new photography fans, six thoughts on purchasing Speedlights
-
A good shot for commercial shooting: Start from light distribution!
-
Dedicated to new photography fans, three key methods for the operation of Speedlights
-
Understanding these will allow you to easily play with filters
-
Methods on shooting interior lighting
-
Achieve professional results for your portraits with some creativity!