Photography is actually very simple: teaching you to understand what is EV exposure?
2018.06.02
"‘The addition and subtraction of EV values’ is a term that photography beginners often heard. EV value is also exposure value, which direct affect the exposure and darkness of the photo, which is what people often say “you photo is over-exposed” , “your photo is too dark”. This article will explain how to add or subtract the EV value, differences, and how to adjust the exposure in PSAM modes? "
Remember the PSAM camera mode settings taught previously? After familiarizing yourself with the camera mode settings and the combination of the camera's aperture and exposure time, I think you have already mastered and get yourself ticket to become a professional photographer. However, after knowing the significance of these settings, you also need to further understand how to use them to shoot beautiful photos which everyone likes. The best way to learn is to look at other photographer's works and related photography information on the internet, such as my photography workshop. However, when it comes to the issue of exposure, we often see the word “EV,” and often hear “+1 EV” or “-2 EV”. What is this all about? What is EV in the end? Why do you have to add or subtract them?
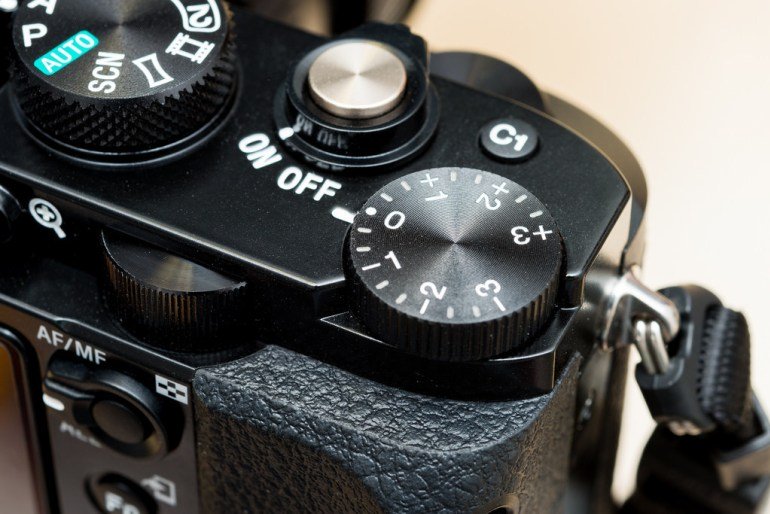
EV is Exposure Value, basically is about whether the photo is “bright enough”. The camera’s light meter (which will be shown below) will show the EV value of the current camera settings, and there is also an adjustable knob ( shown as above, while some cameras are adjusted on the screen) which also indicate “EV”. This setting is called "exposure compensation", which is what we often call the addition or subtraction of EV. What we are teaching today is about the exposure compensation, and the effect of addition and subtraction of the EV value !
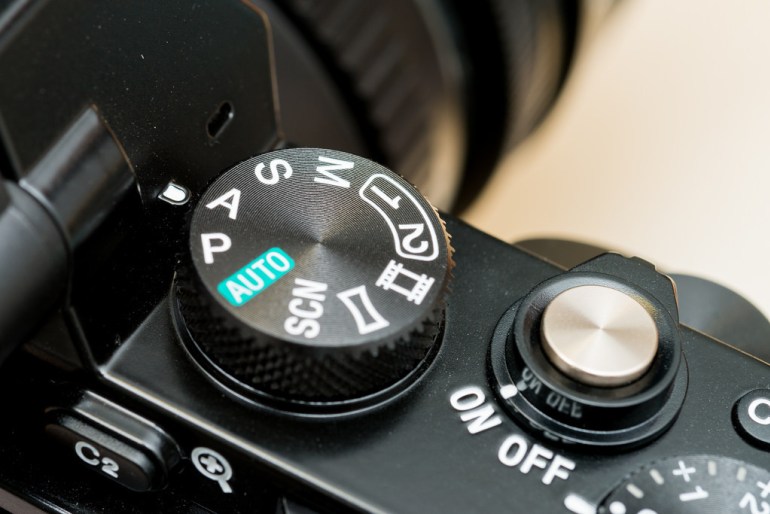
Before we get started, let's first understand the use of exposure compensation in different modes, thus it is also better to clarify what effect the exposure compensation in different modes has. In the camera's PSAM, besides the completely manually adjusting all values in the M mode, exposure value can be adjust in the exposure compensation of the other three PSA modes. Therefore, if you're used to M mode, you would not need to be too familiar with the impact of the following two SA modes, because it is useless for you! Just check out the relevant examples of exposure compensation application below. PS: In M mode of some cameras, the adjusting of the exposure compensation will also adjust the camera's ISO value in connection, but I think it would be better to adjust just the ISO value, without playing with exposure compensation. And you have already choose to use M mode, why not learning about the adjustment of the ISO value, right? Don't be lazy to play with the camera! Exposure compensation in A mode: Camera automatically adjusts the exposure time
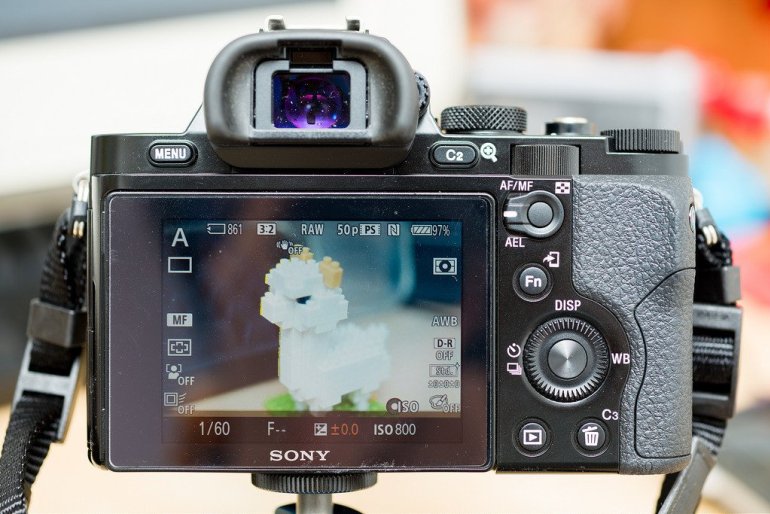
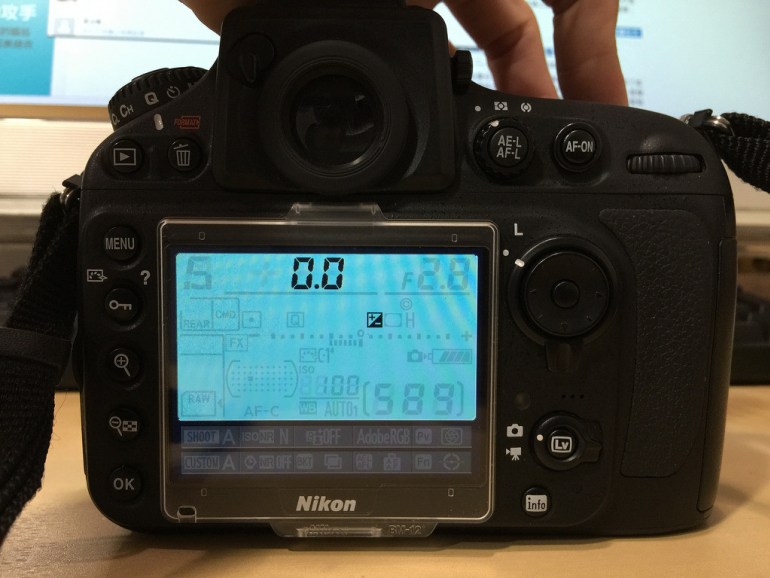
As long as the user set the camera's aperture in A mode (I use a manual lens and fixed in f4, but the camera does not show the aperture value), the camera will automatically meter and adjust the shutter speed to get the most suitable camera exposure value, that is, where EV0 is reached (Check out the orange number 0.0 below shown in the figure above, this number is the camera's light meter).
But the metering of the camera is not that accurate. If you got dark pictures while using the automatic camera light measuring in A mode (for example, it normally happens during shooting backlighting picture), then you will need to use exposure compensation to “forced” to take brighter photos. At this time, we will adjust the exposure compensation settings, changing in the +1EV, +2EV, letting the camera automatically adjust the appropriate exposure time to get brighter photo. As you can see in the image above, when the EV value is adjusted to +3.0, the camera exposure time is increased from 1/60 second to 1/8 second, and the llama in the LiveView preview also becomes very bright. This is the effect of adjusting exposure compensation in A mode. On the other hand, if you adjust the EV to negative numbers like -1EV, -2EV, etc., the exposure time will be shortened and the photos will be darker! Exposure compensation in S mode: Automatically adjusts the aperture value
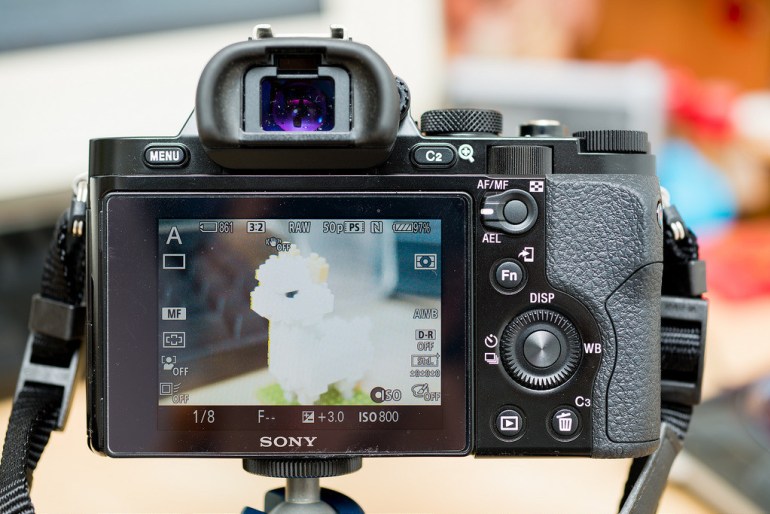
After reading the introduction of A-mode exposure compensation, I believe that smart people might able to guess what will happen in S mode? That's right! It will automatically change the aperture value! Take the above figure as an example, when the camera is set in S mode, the camera automatically sets the aperture at f2.8 to obtain the correct exposure value of 0.0.
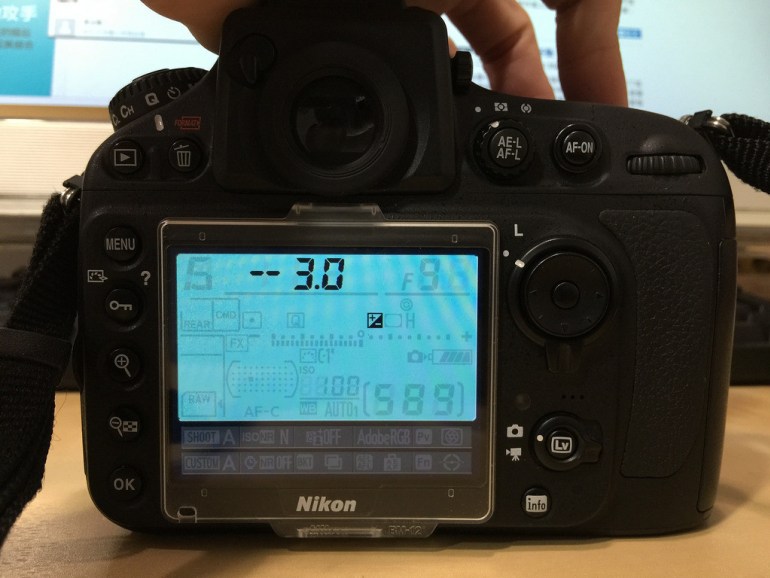
However, if we find that the photograph taken is too bright (special colour contrast causes automatic metering to fail), we can adjust the exposure compensation to lower the EV value. For example in the image above, -3.0EV will reduce the aperture to f9 to reduce the exposure. This is the effect of exposure compensation in S mode. On the other hand, if you find that the picture is too dark, you can increase the EV in exposure compensation to enlarge the aperture to obtain more exposure! PS: If the aperture has reached the maximum value of the lens in the state of 0.0 (for example, f2.8 in the figure above), and you wish the photo will be brighter at this time, do extend the exposure time instead of adjusting the exposure compensation. This is because no matter how you +EV , aperture will not become bigger as it reached the max! When to use exposure compensation?
W
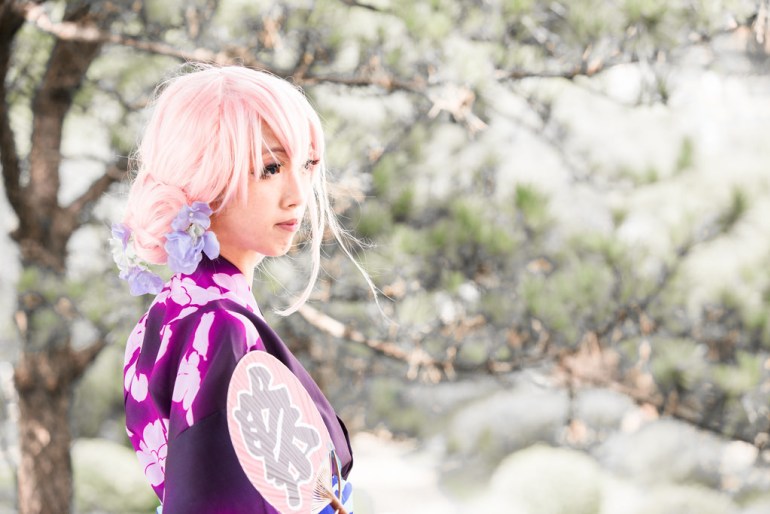
After reading the above exposure compensation instructions, I think that we already know the use of exposure compensation (add or subtract EV)? This time we will apply it! In the above picture, this photo is obviously a portrait shot with a large aperture (the backgrounds are all blur~), but the scene is sunny while model is standing in the pavilion, thus using the camera's global photometry to shoot in the A mode, you will definitely get a photo with a bright background but darker portrait. At this time, we can use exposure compensation to increase the exposure of the portrait part by “+EV”. In this way, not only can the portrait part achieve sufficient brightness, but can also give the impression of overexposed photographs, giving the overexposed beauty of “Japanese-style photographs”.

If you still can't understand after reading the above description, then take a look at the figure above! Due to the direction of the face is the same as the direction of the sun, at this time the camera's metering and automatic adjustment will make the background to normal brightness (not too bright) and the face too dark. Some people refuse to make use of the exposure compensation but using flash light to make up for the brightness of the face. However, I personally think that this would lose the significance of photographing under the bright sun. We should make good use the environment of the bright sun to create a special sense of beauty.
At this time, you can increase the EV exposure compensation to force the camera to take a picture with a slower exposure rate. This will allow the background to overexpose and compensate the brightness of the model’s face, and at the same time achieve a blurred background (especially when the above background is complex), therefore complement the brightness of the two needs. Of course, if you think that the face is still not bright enough, you can also consider using reflectors or other equipment to make up for the reverse exposure, but that is a higher-level application, which we will not talk about it today.
The above figure is the same situation, where shooting against the light under the sun often results a darker face. In A mode, it is also due to the problem of photometry. You may consider using spot metering to solve it, or you can use the "exposure compensation" taught here. For the above figure, we need to increase the brightness of the face, so we need to let the camera take a longer time to perform the exposure, therefore +1~2EV is needed (force the camera to elongate the shutter speed) to increase the photo exposure value.
Where else, if the photo taken under auto metering is too bright, you have to use -EV to force the camera to lower the shutter speed to reduce the exposure! In simple terms, exposure compensation is the solution to the problems that occur when the photo is too bright or too dark in these three automatic modes of the PSA. It is considered to compensate for camera metering that is not as expected. After reading today’s teaching, did you find that it seems like adjusting the EV and adjusting the exposure time is similar? In fact, the exposure compensation (addition and subtraction EV) is a manual exposure adjustment process, but it will still rely on the camera to help you adjust to the EV0.0 status. However, I personally recommend that, unless you really are not really familiar with the camera, using the fully manual M mode may sometimes be a simpler method. Just stare at the camera's meter and adjust the exposure time, in fact, with the exposure compensation has also almost the same meaning. It depends on which method you think is easier! If you are interested in our articles, you can also LIKE our page:)
相關文章
-
Camera for girls, consideration of appearance and right tech on the inside
-
Things to know before buying a camera: 8 things to be get ready before purchasing
-
A good shot for commercial shooting: Start from light distribution!
-
Dedicated to new photography fans, three key methods for the operation of Speedlights
-
Understanding these will allow you to easily play with filters
-
Introduction to the classifications of Nikon manual focus lens